Model (raster, vector, 2D, 3D, render, animate, simulate, ...) a possible final project, compress your images and videos, and post a description with your design files on your class page
☑ Modelled experimental objects/part of a possible project in 2D and 3D software.
☑ Shown how you did it with words/images/screenshots.
☑ Documented how you compressed your image and video files.
☑ Included your original design files.
Since at the younger age, I like to draw anything using freehand sketch (not referring to the Freehand software!). Once I got my own free time, I will just grab a stack of recycled papers to start lie down on the floor and start drawing. Moving towards the years, instead of draw freely, I started to “copy” pictures that I feel it is nice and worth to keep. I can learn the skills from various artist and it helps me to improve my drawing skills, from black-and-white sketching to colour painting.
For this week, I would like to use my draft final project as an example to demonstrate various types of Computer-Aided Design software, starting from 2D modelling to 3D modelling.
Photo and Video Compression
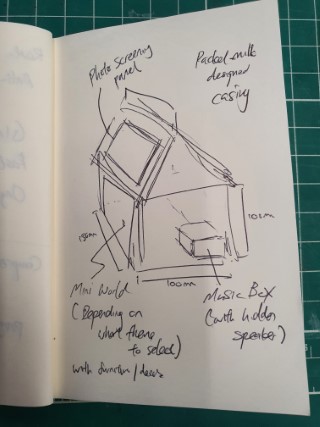
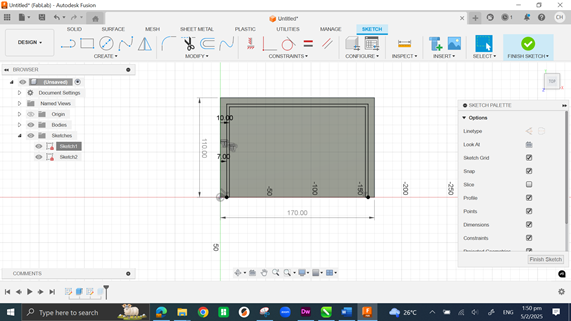
At the very beginning, I create a paper sketch to help me think through how I should go about creating the various forms of the model, and the sketch dimensions.

After finished my sketch, I used my handphone and take a snapshot on my sketch and upload as a HD file. As you can see from the next snapshot, the original file size was 528KB. I installed “Power Toys” that allows me to resize my files to a smaller version. Proved that the image has been reduce dramatically to 32KB. This helps me on documenting my work with more small files to show and review than one big file that show nothing meaning full.
Since it is still starts of the course, I might not have prepared any video to demostrate my final project. Hence, I just random take one video that related to my final project, that is the sample model that I have purchased for referencing purpose.
Once after I took the video, I tried to use various method to compress my video:
1) Using Handbrake video editor.
2) Using Video Compressor.
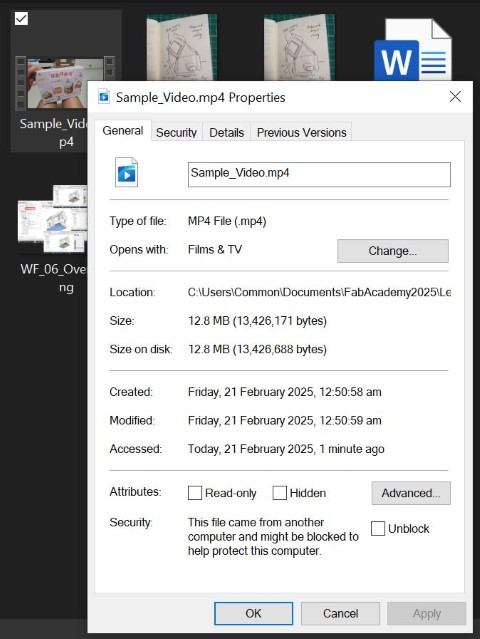
Here is my original file size for my video:
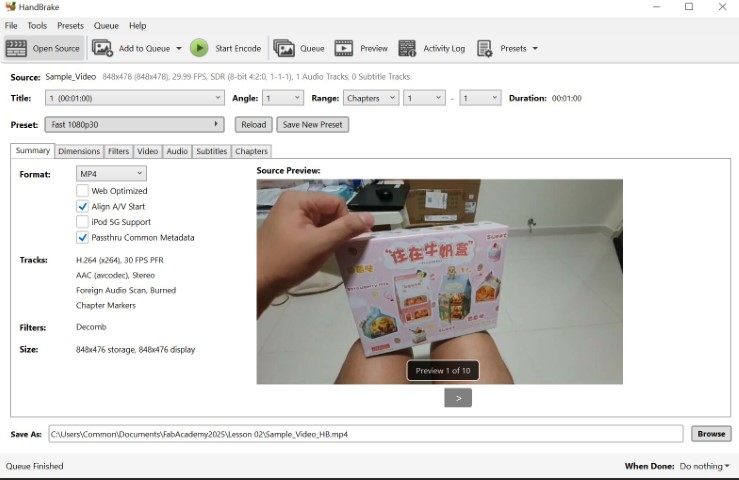
1. Using HANDBRAKE software
* Open Handbrake software from browser, then open the file that I am targetting to resize.
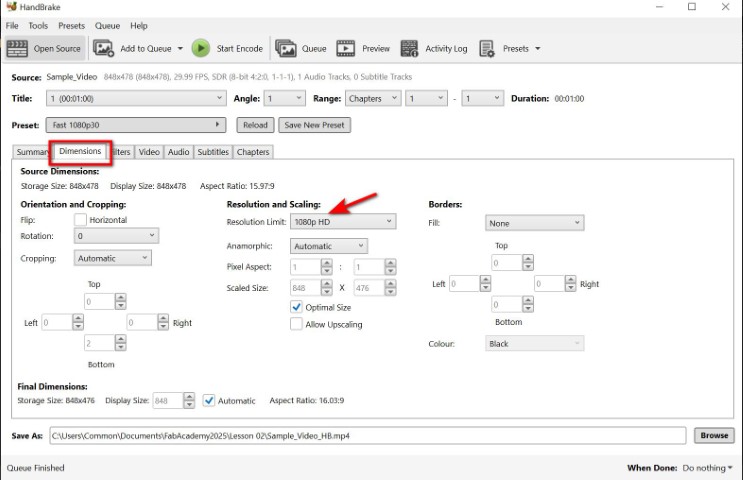
* Under "DIMENSIONS" tab, ensure the resolution limit is 1080p HD.
* Under "VIDEO" tab, ensure the video encoder is H.264 (x264).

*Ensure the file save in my desinated folder, then press "START ENCODE".
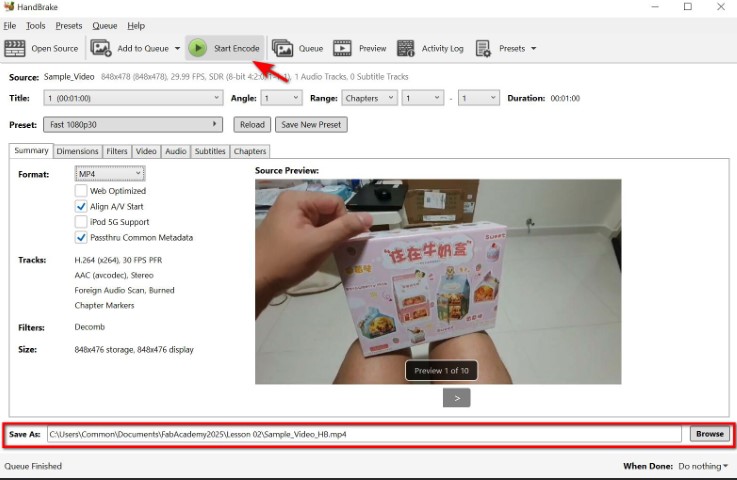
Here is the final file size after resized using HANDBRAKE software, reducing from 12.80MB to 10.40MB.

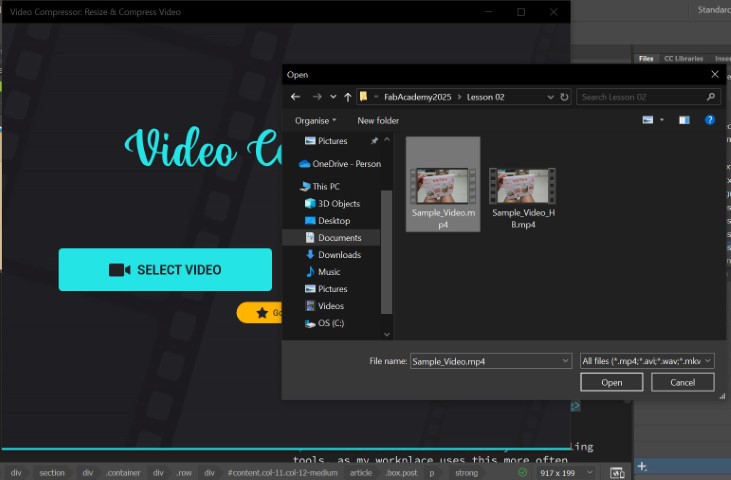
2. Using VIDEO COMPRESSOR
* Open Video Compressor software and select the file that I wish to downsize.
* Select "BEST QUALITY" setting, and change the bit rate to 1080.
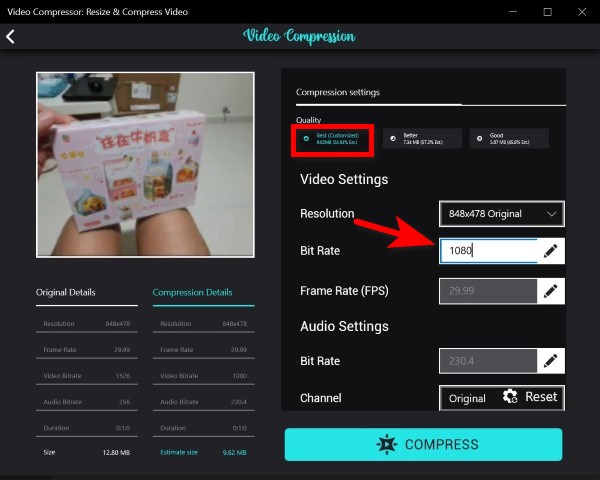
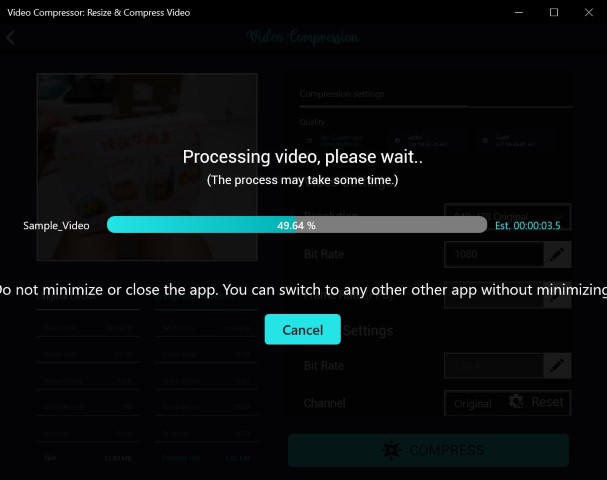
* It willtake some times to encode it.
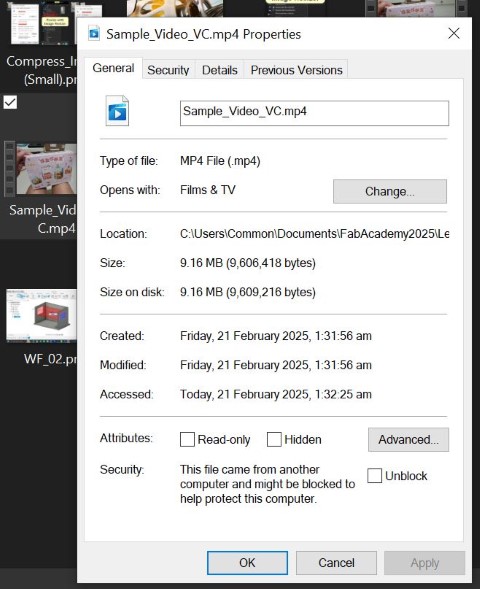
* Here is the final file size after resized using VIDEO COMPRESSOR software, reducing from 12.80MB to 9.16MB.
2D modelling
For 2D modelling, i am exploring both GIMP 2.10.24 and Inkscape as my raster and vector software respectively.
For GIMP exploration, I have selected a BARCELONA crest as my reference layer for demostration.
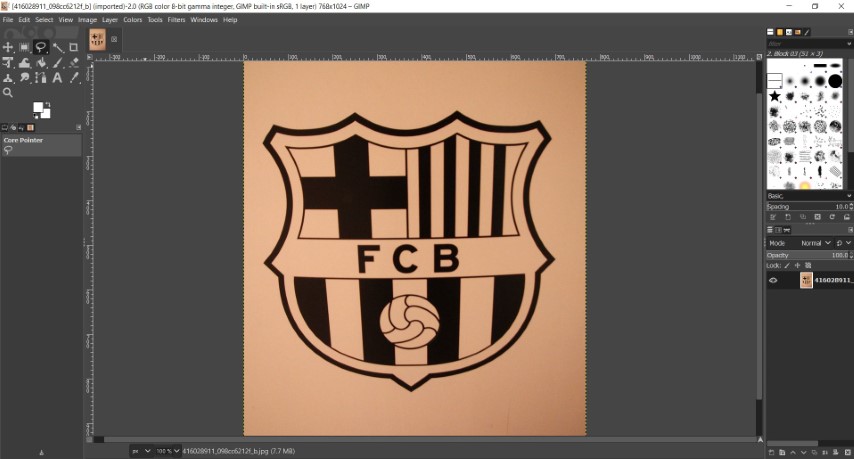
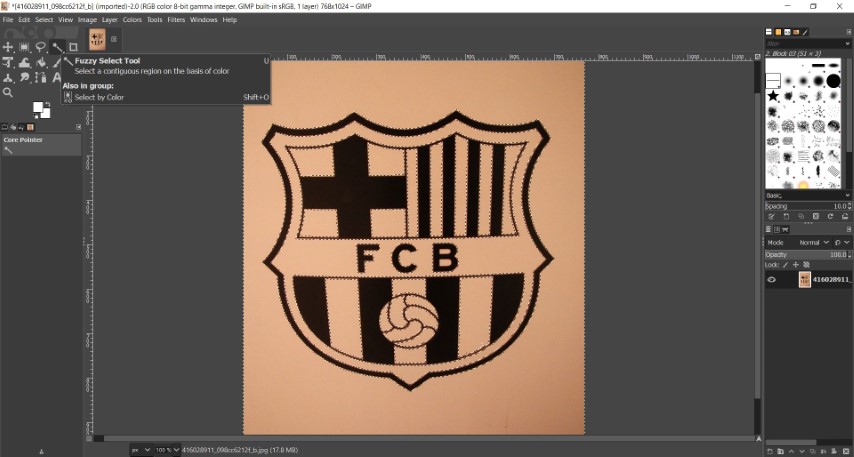
Generally, I used this software to just fill the areas or spots that I need to cover up or differentiate with different colours using Fuzzy Select Tool. As shown in picture below, the dotted boundaries are being selected to be cut out/coloured with different colour using the function mentioned above.
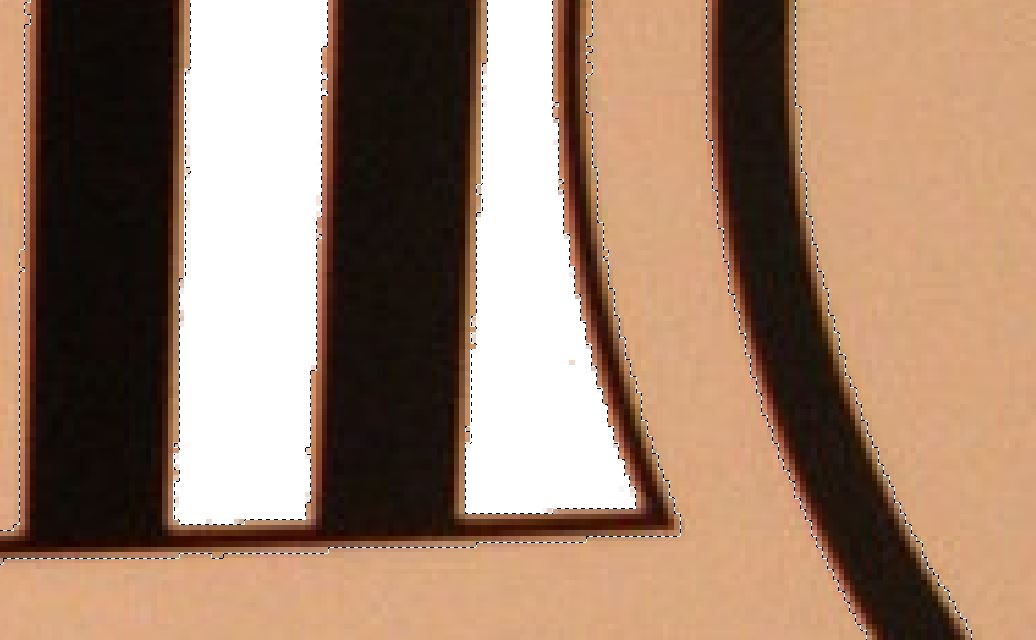
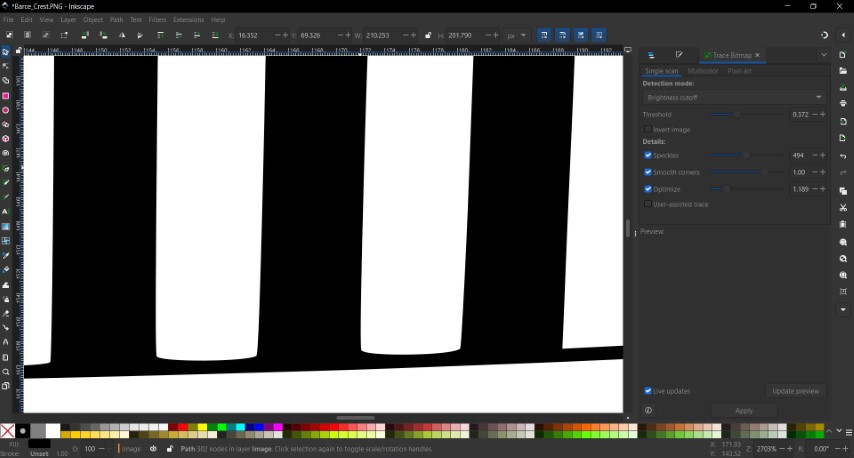
As a result, the image is composed of pixels and the lines look blurry when you zoom in.
Then I saved the file in PNG format for next exploration using Inkscape apps.
I start this section by importing the PNG file into the Inkscape. Then I use the Trace Bitmap (under Path tab) function to convert the PNG file into vector curves.
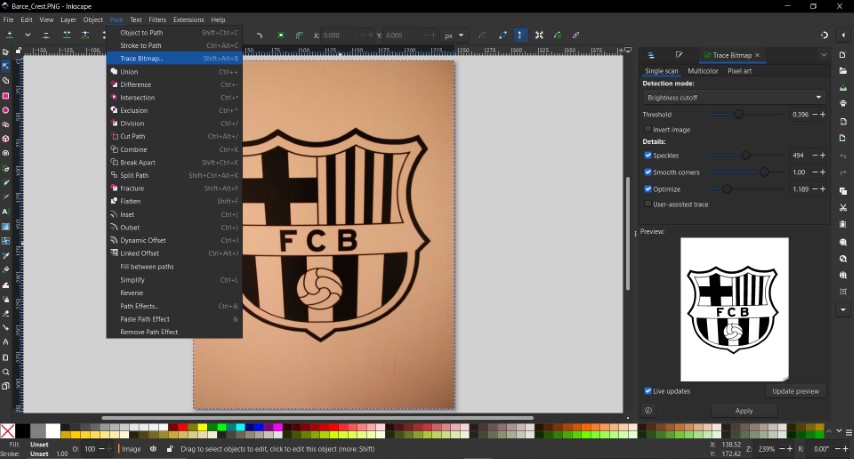
After confirming the image from PREVIEW, Press "APPLY" and there will be a new image appear overlapping the original image. Make sure to select the PATH format picture and remove the IMAGE format picture. Unlike a raster image, a vector image does not lose resolution because the image is defined by the direction of the vector, rather than pixels.
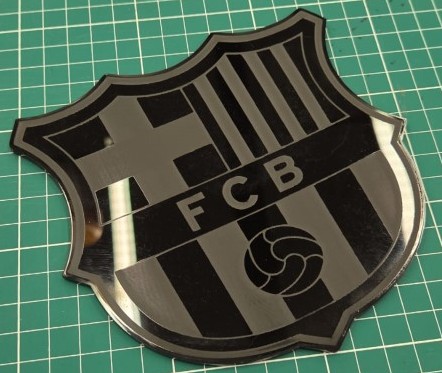
I exported the traced file as SVG format and brings to laser cutter to engrave and vector cut the image, as shown be
3D modelling
I have selected Fusion360 as my 3D modelling tools, as my workplace uses this more often compare to other 3D modelling software.
Ever since I started learning on Fusion360, my instructor Mr. Steven Chew has shared me a very useful link on “mastering” the software.
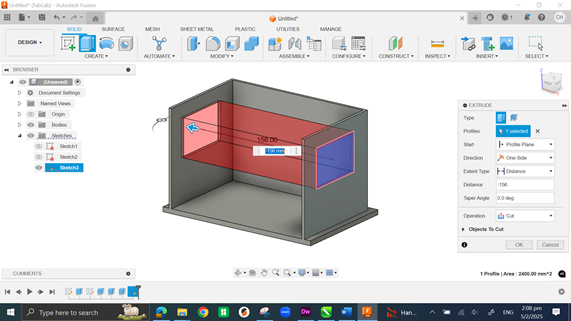
Generate a base structure of a packet milk model, which carries the dimension mentioned in my sketch.
Extrude the required sections and make a few openings.
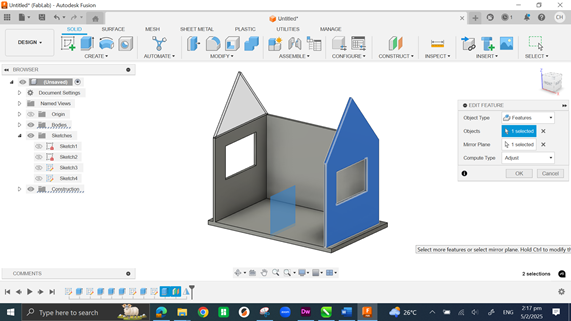
Select a correct sketch plane to make a roof top of the model. Then create a new “Offset Plane” as a reference plane for mirroring purpose.
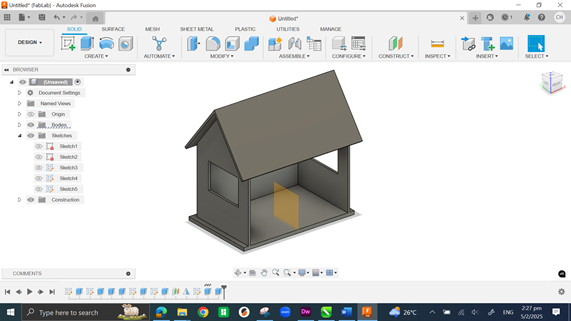
After complete the main body, I try to model some major components that should be with my final project – a musical box and a photo-screening panel. All components’ dimension are still yet to confirm.
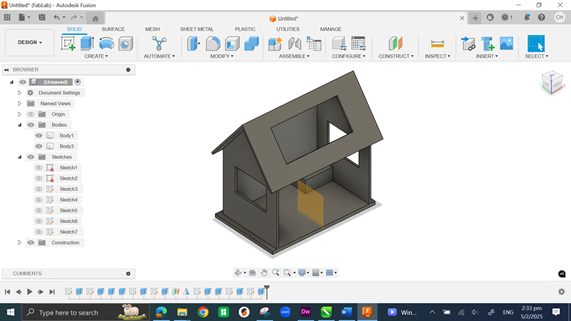
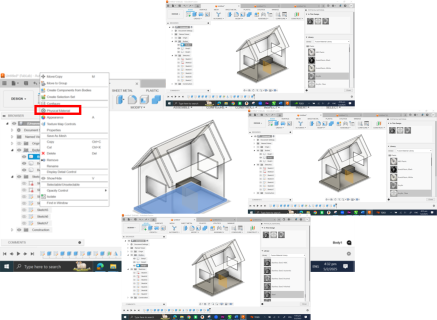
Lastly, we can select appropriate material from the library. As a trial model, I just pick Opaque acrylic for the base (Body1), Clear acrylic for the body (Body2, can see through the internal parts of the musical box), and Metal for the components (Body3). Once you decide, just drag the selected material to the respective bodies.
CAD model files
Fusion 360 (.f3d) .